Note: (Pictures are just examples/guide please use the settings in the text)
Description:
New Email Server Settings For iPhone Native Mail App
Resolution:
1. Add your email account.
- If this is the first account you are setting up on this iPhone, tap Mail and then select Other.
- If you already have another email account set up, go to the home screen and navigate to Settings > Accounts & Passwords> Add Account > Other > Add Mail Account.
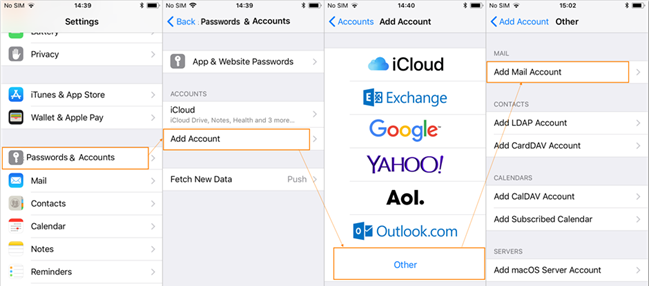
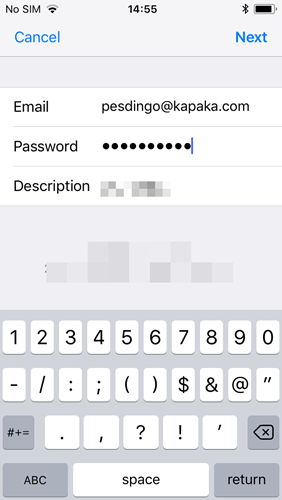
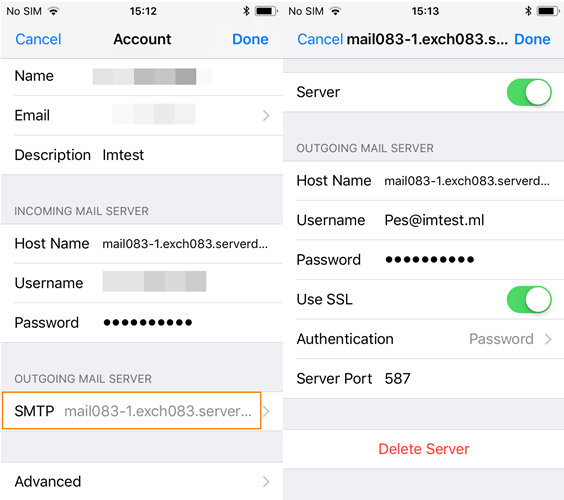
2. Enter account information.
- Name: (Optional) Enter the name as you would like it to appear in the "From" field of the outgoing messages.
- Email or Address: Enter the complete email address.
- Password: Enter the mailbox password.
- Description: (Optional) How you want to identify the specific email account. For example: "Work email".
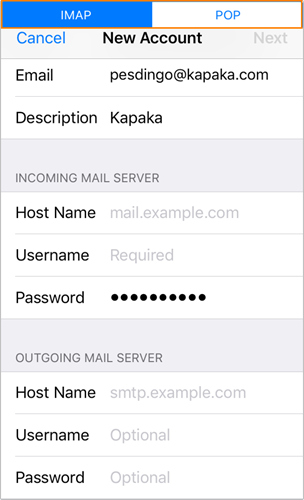
3. Select
IMAP
Incoming Mail Server
- Host Name: Enter mail.securecloudmail.us
- Username: Enter your email address.
- Password: Enter your password.
Outgoing Mail Server
- Host Name: enter mail.securecloudmail.us
- Username: Enter your email address.
- Password: Enter your password.
- Tap Next. The device will detect your incoming and outgoing mail settings as well as port settings and connect to your mailbox.
4. You should be redirected back to the screen where you will see your current email
Accounts. Tap back into the one you just set up. Scroll down and tap
Advanced. Make sure in the Incoming Settings section the following settings are used:
- Delete from server: Never (you can set as you wish)
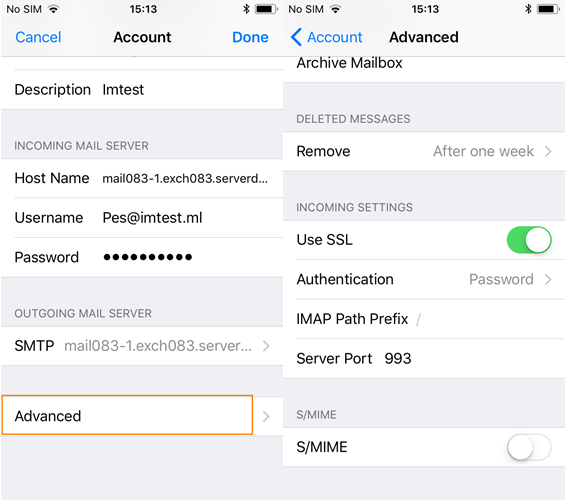
Tap the back button in the upper left of the screen. Tap
SMTP under Outgoing Mail Server. Tap server name under
Primary Server. In the
Outgoing Mail Server section use the following settings:
- Tap Done to complete the setup process.
- To access your account, launch the Mail application from the home screen. If you have more than one email account set up on your device, you may need to use the back button in the upper left corner of the screen to switch between them.